Why Exterior Caulk Comes Before Paint: 5 Costly Skips
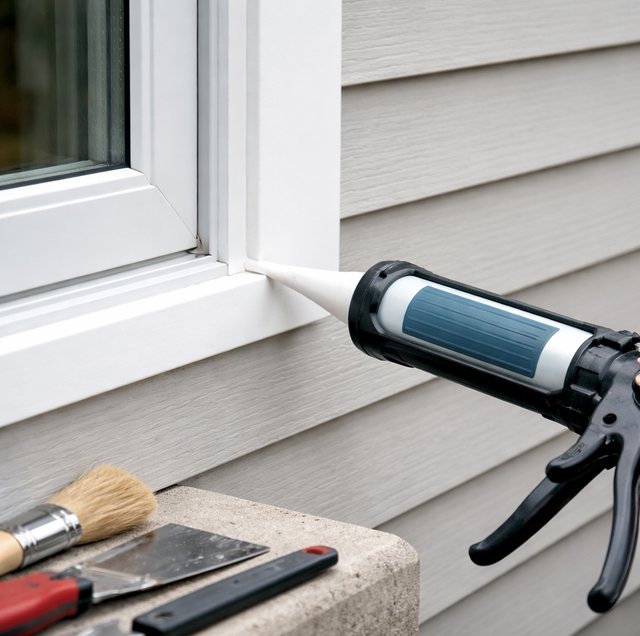
Quick Answer: Caulking seals the gaps and joints on a home's exterior so water, air, and insects cannot get behind the paint and siding. Done before painting, it protects the joints paint alone cannot bridge, which is why a good painter treats it as prep, not a finishing touch. The catch: certain gaps are drainage points and must stay open, so caulking the wrong spot causes the exact rot it is meant to prevent.
A fresh coat of paint gets the attention, but the bead of caulk hidden in the joints is doing the quieter, harder work. Paint is a thin film. It flexes a little, sheds some water, and blocks UV, but it cannot span an open gap between two boards. Wherever the siding meets a window frame, a corner board, or a run of trim, there is a seam that opens and closes as the house heats, cools, and settles. Left raw, that seam is a direct path for water to travel behind the finish. Once moisture sits behind paint, the film loses its grip, blisters, and peels, and the wood underneath starts to rot from the back where no one sees it until the damage is already done.
Understanding what caulk does, before worrying about how or where to apply it, is what separates a paint job that lasts from one that fails in a couple of seasons.
What Caulk Actually Does On An Exterior
Caulk is a flexible sealant that fills the gap between two surfaces and stays elastic enough to move with them. On the outside of a house, it has three jobs.
It keeps water out of the joints: Rain does not fall straight down. Wind drives it sideways and up under laps and edges. A sealed joint stops that water from wicking into the seam and reaching the sheathing behind the siding.
It blocks air movement: The same gaps that let water in also let conditioned air out and outside air in. Sealing the joints around windows and doors cuts drafts and takes load off the heating and cooling system.
It keeps insects and debris out of small openings: Gaps around trim and penetrations are entry points for ants, wasps, and wind-blown grit. A tooled bead closes them without trapping anything that needs to breathe.
A useful way to hold this in mind: caulk is the gasket between the panels of the house, the way a door gasket seals a refrigerator. The panels do the structural work; the gasket keeps the boundary tight. Skip the gasket and the whole assembly leaks at every seam.
Why It Has To Happen Before The Paint
Caulk applied before priming and painting gets locked under the finish coats, so paint bridges the tooled edge and the whole joint reads as one continuous surface. That does two things. It seals the joint for the life of the coating, and it hides the bead so the wall looks clean instead of showing a rubbery line at every seam.
Caulk added after painting sits on top of the finish, collects dirt along its edges, and tends to peel away sooner because paint is not gripping it from above. It also looks like a repair, because it is one. Sequencing the sealant into the prep stage, cleaning, scraping, caulking, priming, then painting, is what makes the result both weather-tight and clean to the eye.
Where To Caulk
Not every gap gets sealed, but these joints almost always should:
Trim-to-siding joints: Wherever a trim board sits against the field of the siding, the seam along its edge should be sealed.
Around windows and doors: The joint where the frame or brickmould meets the siding is a prime water entry point. Seal the sides and the top.
Corner boards: The vertical seams where corner boards meet the siding on each face.
Where dissimilar materials meet: Wood trim against stucco, siding against a masonry chimney, a wood frame against a concrete step. These materials expand at different rates, so the joint between them needs a flexible seal.
Nail holes and small penetrations in trim: Filled, sanded, and painted over, these disappear.
Where Not To Caulk
This is the part that gets homes into trouble, because it runs opposite to instinct. Some gaps are drainage and ventilation by design, and sealing them traps the very water they exist to release.
Weep holes. Window frames and brick veneer have small openings along the bottom that let trapped water escape. Caulk them shut and water that gets inside the assembly has nowhere to go but into the wall.
The bottom edge of lap siding and clapboards: The underside of each course is meant to stay open so any moisture behind the board can drain and the wall can breathe. A bead runs along that bottom lip, seals moisture in, and invites rot.
Drainage gaps at the base of trim and around some flashing: Where a piece is designed to shed water down and out, a bead across the exit point dams it.
Seal the tops and sides of a joint so it sheds water down and away, and leave the bottom open so anything that does get in can drain back out. Weep holes, the underside of lap siding, and designed drainage gaps must stay open.
Choosing The Right Caulk
The wrong product is as bad as no product, because a caulk that will not hold paint or will not flex fails differently.
Paintable acrylic-latex: The everyday exterior caulk for trim seams and general joints. It takes paint well, cleans up with water, and is easy to tool. Good for joints with modest movement.
Siliconized acrylic: Acrylic-latex with silicone added for better adhesion and flexibility while staying paintable. A reasonable step up for joints that see more movement.
Polyurethane: A tougher, more elastic sealant for wider or higher-movement joints and areas that take abuse. It holds paint, but it is stickier to tool and usually needs solvent for cleanup. Work in ventilated conditions with solvent-based products.
100% silicone: Excellent as a sealant, but usually not paintable. Paint beads up and will not stick to it, so it is the wrong choice anywhere the finish coat needs to cover the bead. Read the label; a tube that says "not paintable" has no place under exterior paint.
Match the caulk to the joint width and how much it will move, and confirm on the label that it is rated for exterior use and, where it matters, that it accepts paint.
Prepping The Joint And Tooling The Bead
A bead is only as good as the surface under it. New caulk will not bond to a dirty joint or to old caulk that has already let go.
Clean the joint: Remove dirt, chalk, and loose material so the sealant meets a sound substrate.
Remove old failed caulk: Pull or cut out cracked, shrunken, or peeling caulk. Fresh sealant laid over failed caulk fails with it. On any home built before 1978, old paint and caulk may contain lead, so test before scraping or sanding and follow safe practices if lead is present.
Back wide or deep gaps with backer rod: For a gap wider than roughly a quarter inch, press a foam backer rod into the joint first. The rod sets the depth so the caulk bonds to the two side walls only, not the back, which lets the bead stretch and compress without tearing. Caulk packed into a deep gap with no backing is more likely to split.
Tooling and curing: Run a steady bead that contacts both sides of the joint, then tool it once with a wet finger or a tool to press it into full contact and leave a slightly concave face. That shape sheds water and reads clean under paint. Then let it cure. Acrylic products usually need a few hours to skin and longer to cure through; polyurethane and heavier sealants can need a day or more. Painting over caulk that has not cured traps solvent and moisture and can wrinkle the finish. Check the tube for cure time and respect it before priming.
A Word On Weather And Safety
Sealant cures within a temperature and moisture window printed on the tube, and both extremes matter year-round. Cold slows the cure and can keep acrylics from setting properly; heat and direct sun can skin a bead too fast so it cures on the surface while staying soft underneath. Neither is a single-season problem. Plan the work for mild, dry conditions and a dry surface whenever that falls on the calendar.
Much of this work happens on a ladder at the top of walls and around windows, where a fall is the real hazard, so stable footing and a helper matter more than speed. On older homes, treat old paint and caulk as suspect for lead until a test says otherwise.
Frequently Asked Questions
You can seal a joint over sound, well-adhered paint, and often you should, because the paint is part of the surface the caulk bonds to. The problem is loose or peeling paint: caulk laid over a flaking edge is only as anchored as the flake beneath it. Scrape back to a firm edge first, then seal. Where paint is failing across a whole board, the board needs scraping and priming before caulk, not a bead over the mess.
A quality paintable sealant applied to a clean, properly backed joint commonly holds for many years, often outlasting one repaint cycle, while a bead squeezed into a dirty or oversized gap can split within a season or two. Lifespan tracks prep and joint design more than brand. Inspect the sun- and weather-facing sides of the house first, since those age fastest, and look for hairline splits down the center of the bead, which signal the caulk has lost its stretch.
They solve different problems. Caulk stays flexible and is meant for joints that move, like the seam between two boards. Filler, such as an epoxy or a hardening exterior wood filler, dries rigid and sands flush, so it is for holes, gouges, and damaged wood that will not move, like a chewed-up corner or a rotted section rebuilt with epoxy consolidant. Using flexible caulk to fill a divot leaves a soft spot that never sands smooth; using rigid filler in a moving joint cracks it.
Usually not along the bottom, and this trips people up. That baseline often needs to drain and breathe, and sealing it can trap ground moisture against the sill and lowest course. A weep screed at the base of stucco, for example, is a drainage detail that must stay clear. Seal intentional penetrations nearby, like a hose bib or a cable entry, but leave the designed drainage gap open.
It depends on the substrate. Bare or badly weathered wood benefits from a coat of primer before caulking, because the primer seals the wood and gives the caulk a stable surface to grip, rather than raw grain that can wick moisture and undermine the bond. On already-painted, sound surfaces you can caulk first, then prime and paint over the bead. Either way, the finish coats go on last so paint locks the bead in.
Only if the product allows it, and most standard acrylics do not fully cure in an hour. Some paintable caulks are labeled "paint in 30 minutes" or "ready to paint the same day," and those are formulated for it; a general-purpose tube is not. Painting an uncured bead can trap moisture, cause the paint over the caulk to wrinkle or crack, and leave a line that shows through. When the schedule is tight, buy a fast-cure paintable caulk on purpose rather than rushing a standard one.
Book a free exterior estimate before the next repaint — get the joints sealed right so the paint lasts. Mark's Painting serves Tampa Bay and surrounding areas. Licensed & Insured. Call (813) 831-5433.
