What Paint Finish Holds Up Best on Kitchen Cabinets? The 2 Choices That Decide It
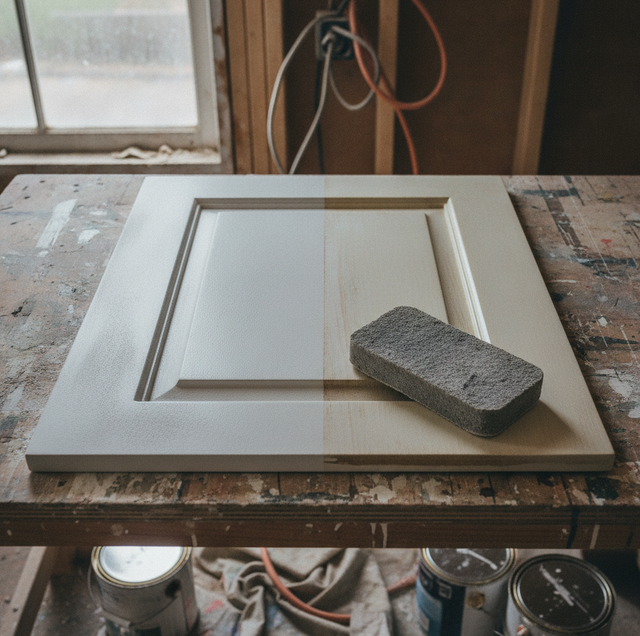
Kitchen cabinets take more abuse than almost any painted surface in a home. Fingers push the same drawer front a dozen times a day, cooking grease drifts up onto the doors above the stove, and someone wipes the same handle area down every week with a soapy rag. A finish that looks flawless the day it dries can turn dull, chipped, and grimy within a year if the wrong product was used or applied incorrectly. Getting cabinets to look sharp and stay that way comes down to two decisions and one process: the sheen you pick, the type of paint you use, and the prep that ties both together.
Quick Answer: For most kitchen cabinets, satin or semi-gloss in a cabinet-and-trim enamel is the sweet spot. Semi-gloss is the most washable and durable, and gives the crispest look, while satin cleans well and hides minor flaws better. Flat and matte are poor choices because they mark and won't survive repeated scrubbing. But the enamel and the prep matter more than the sheen alone.
Sheen: How Shiny the Finish Should Be
Sheen is simply how much light a paint reflects once it dries, and on cabinets, it does more than set the look. The higher the sheen, the harder and tighter the dried film tends to be, which means it shrugs off moisture and wipes clean instead of soaking up stains. That trade-off is why the two workhorse sheens for cabinets are satin and semi-gloss, and why flat gets left for ceilings and low-traffic walls.
Semi-gloss is the most durable and washable of the common sheens. It cleans up with a damp cloth, resists moisture that hangs around a sink and stove, and gives cabinets a crisp, finished edge that reads as high-quality. The catch is that its reflectivity is honest to a fault: every dent, sand scratch, brush ridge, or filled nail hole shows more clearly under a shine. On old cabinets with imperfect surfaces, semi-gloss can advertise flaws you would rather hide.
Satin is the softer step down. It still cleans well and holds up to regular wiping, but its lower reflectivity forgives minor surface imperfections that semi-gloss would spotlight. For cabinets with some age, some grain texture, or repairs that are not glass-smooth, satin is often the more flattering choice while giving up very little in washability.
High-gloss is the toughest and most washable finish of all, almost glasslike, and it wipes down like a countertop. But it is completely unforgiving of prep: the mirror surface magnifies every ripple, so it only looks right over a near-perfect substrate, usually sprayed. It also reads as a bolder, more dated look in many kitchens, so it is a deliberate style choice rather than a safe default.
Flat and matte have no place in a working kitchen cabinet. The same porous, low-reflection quality that hides wall flaws also grabs grease and fingerprints and breaks down when you scrub it. On a surface that gets touched and cleaned constantly, a flat finish looks tired fast.
Paint Type: What the Finish Is Actually Made Of
Here is the part most people skip: sheen describes the look, but the paint chemistry decides whether the finish survives real kitchen use. You can put a semi-gloss on cabinets and still end up with a soft, scuffable surface if the underlying paint was never built to cure hard. Think of it like a phone screen: the glossy shine on top means nothing if the glass underneath is soft enough to scratch with a fingernail. The hardness has to come from the material itself.
That is why cabinet-grade enamels exist as a separate category from ordinary wall paint. A waterborne alkyd or acrylic-alkyd enamel, usually sold as a "cabinet and trim" or "door and trim" product, is engineered to do two things that wall paint cannot. First, it levels: the wet film relaxes and flattens as it dries, softening brush and roller marks so the surface reads smooth. Second, it cures to a truly hard film that resists the chips, scuffs, and dings that cabinets collect at knee and hip height. Ordinary wall paint stays comparatively soft and rubbery no matter how many coats you add, which is why painted-over cabinets done with wall paint tend to feel tacky, mark easily, and peel at the edges.
For the most demanding jobs, some painters spray a two-component (2K) or urethane product that chemically cross-links into an even harder, more chemical-resistant shell. These systems are less forgiving to apply and are typically a professional's tool rather than a weekend option. More commonly, a pro reaches for a bonding primer first, a specialized undercoat formulated to grip slick, previously finished, or factory-sealed cabinet surfaces that regular primer would slide right off. That grip is what keeps the whole system from peeling later.
The takeaway: choose a cabinet-and-trim enamel that cures hard, and treat the sheen as a decision you make within that category, not instead of it.
Prep: The Step That Actually Decides Whether It Lasts
You can buy the best enamel on the shelf and still watch it fail in months if the prep was rushed. On cabinets, prep is not the boring part before the real work. It is the real work. Three things make or break adhesion and longevity.
Clean and degrease first- Kitchen cabinets carry a thin, often invisible film of cooking grease, especially the doors and sides near the stove. Paint will not bond to grease; it beads on it. Every surface needs a thorough wash with a degreasing cleaner and a rinse before anything else happens, or the new finish is sitting on a slick layer that guarantees peeling.
Sand or deglaze for tooth- Factory cabinet finishes are smooth and often sealed, which gives fresh paint nothing to grab. Scuff-sanding knocks the sheen off and creates microscopic tooth, and a liquid deglosser does the same chemically on profiles and corners that are hard to sand. This step is what turns a slick door into a surface paint can actually key into.
Prime, then build thin coats, then let it cure- A bonding or stain-blocking primer locks adhesion and seals in tannins or old stains that could bleed through. From there, thin, even coats beat thick ones every time: heavy coats sag, trap solvent, and stay soft, while thin coats level cleanly and cure fully. And curing is the step people most often misjudge. Paint is dry to the touch in a few hours, but a cabinet enamel does not reach full hardness for days, sometimes a couple of weeks. During that window, the film is still firming up, so scrubbing it, stacking heavy items on shelves, or slamming drawers too soon leaves marks the finish never fully recovers from.
The Humidity Factor
Humidity has a direct hand in how a cabinet finish dries, cures, and behaves, and it is easy to underestimate indoors. When the air holds a lot of moisture, waterborne coatings release water more slowly, which extends both the dry time and the cure time. A film that would firm up on schedule in dry air can stay soft well past when it looks finished.
That slow cure sets up a specific failure called blocking, where a painted door sticks to the painted frame or a drawer front bonds to the box, and pulling it open peels or tears the finish. It happens when cabinets are closed up before the enamel has hardened enough to resist contact. The defenses are simple: give the finish extra cure time in humid conditions, keep doors and drawers propped open longer than you think you need to, and place small spacers or soft bumpers at contact points so freshly painted faces are not pressed together while the film is still curing. Patience during that stretch is what separates a finish that stays crisp from one that tears the first time the kitchen gets used.
Application: Brush, Roll, or Spray
How the paint goes on shapes how smooth the final surface looks, and cabinets are where that shows most because you see them up close and in good light. Spraying lays down the most uniform, factory-like finish with no brush or roller texture, which is why it is the standard for a truly uniform, no-texture cabinet job. The trade-off is set up: masking off the kitchen, controlling overspray, and dialing in the equipment takes real effort and experience.
Brush and roller can still deliver an excellent finish, and this is exactly where a self-leveling cabinet enamel earns its keep. Because the product is designed to flow out and relax as it dries, brush strokes and roller stipple soften rather than freeze in place. A quality brush for cut-in areas and profiles, paired with a dense foam or microfiber roller for flat panels, plus thin coats and enough working time, gets a hand-applied finish surprisingly close to sprayed. The single biggest mistake is fighting the paint by overworking it: with a leveling enamel, lay it on, tip it off lightly, and let the film do the flattening on its own.
Frequently Asked Questions
Plan on two finish coats over a primer coat, and lightly sand between every coat, including after the primer. A quick pass with 320-grit paper or a fine sanding sponge knocks down any raised grain, dust nibs, or brush ridges so the next coat lays down glass-smooth instead of stacking texture. Wipe the dust off with a tack cloth or a barely damp rag before recoating. Doors with deep grain, like oak, sometimes need a grain filler or a third thin coat to read fully smooth. Two coats with sanding in between beats three coats slapped on wet over rough.
Degreasing. Kitchen cabinets, especially the doors and sides near the stove, carry a thin film of atomized cooking grease that is often invisible but enough to stop paint from bonding. Wash every surface with a TSP solution or a dedicated degreaser first, then rinse, and do it before you sand, not after, or you just push grease into the sanding scratches. Sanding a greasy door only spreads the oil around and polishes it in. Skip this, and the finish can look perfect for weeks, then peel in sheets where hands and steam hit it most.
A leveling additive helps the film flow out flat, and the right one depends on the paint. For a waterborne (latex or acrylic) cabinet enamel, a small measured dose of Floetrol relaxes the wet paint so brush and roller marks settle and disappear as it dries. For an oil-based or true alkyd enamel, Penetrol does the same job. Add it in the small ratio on the can, not by eye, since too much thins the paint and hurts the cure. The additive buys you a longer open time, so the film keeps leveling after your brush has left it, rather than freezing every stroke in place.
Take the doors off and paint them flat. Unscrew each door from its hinges, remove the knobs and pulls, and label each door and its hinge location with tape so it goes back into the same opening. Then lay the doors flat on a rack, on painter's pyramids, or on screws driven into a scrap board, and paint the back first, let it set, then flip and do the front. Flat is the whole point: gravity pulls a vertical film downward into runs and sags at the panel edges, while a level door lets the enamel pool out smoothly with no drips. Painting hardware in place also guarantees paint bridges into the hinge and locks it up.
Cabinet enamel is dry to the touch in a few hours, but it is nowhere near cured, and closing doors too soon causes blocking, where the painted door face bonds to the painted frame and tears when you open it. Most cabinet enamels need several days before they resist that contact and one to two weeks to reach full hardness, longer in humid air, which slows the cure. Rehang the doors once the film is firm, but stick self-adhesive felt bumpers or small foam spacers on the corners so the faces are held slightly apart for the first couple of weeks. That gap is what keeps two freshly painted surfaces from welding together while the enamel is still setting up.
An HVLP sprayer lays down the most uniform, texture-free film and is what gives cabinets a factory look, because it atomizes the enamel into a fine, even coat with no tool marks at all. The cost is setup: masking off the whole kitchen, managing overspray, and learning to dial in the tip and pressure. A DIYer without that gear can get remarkably close with a foam roller and a tipping-off pass, meaning you roll a thin coat onto the panel with a dense foam roller, then immediately drag a dry, soft brush lightly across the wet paint in one direction to erase the roller stipple. When paired with a leveling additive and applied in thin coats, the hand method reads smooth at arm's length, even though it is not sprayed.
Book a free cabinet-painting estimate — get a hard, wipe-clean finish that stays crisp for years. Mark's Painting serves Tampa Bay and the surrounding areas. Licensed and insured. Call (813) 831-5433 for a free estimate.
