Do You Need Primer Before Painting? The Honest Answer
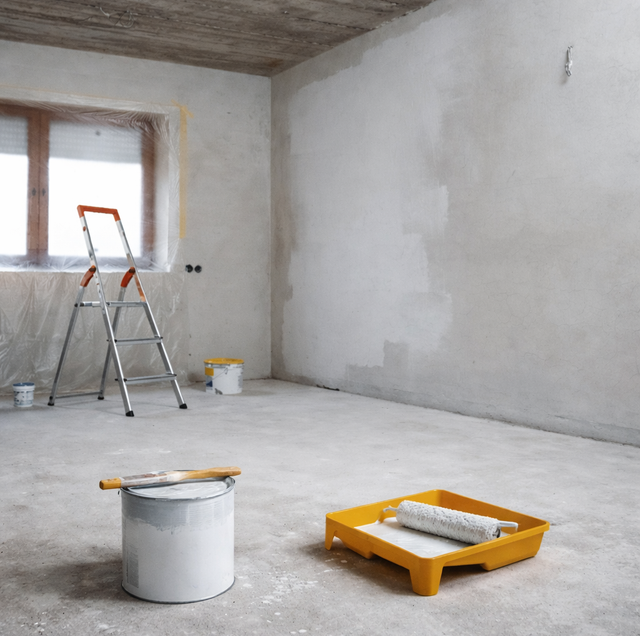
Quick Answer: You need primer on bare or porous surfaces (new drywall, raw wood, fresh masonry), on patched or stained spots, on glossy or slick surfaces that paint cannot grip, and for dramatic color changes. You can usually skip it when repainting a clean, sound, similar-color wall that is already painted and in good shape. A quality paint-and-primer-in-one covers that easy repaint case, not the hard ones.
Primer sits in a strange spot in most repaint projects. It costs a coat's worth of time and effort, it does not show up in the finished room, and half the paint cans on the shelf now promise it is already baked in. So a fair question comes up on nearly every job: do you actually need it, or is it a step you can quietly drop?
The honest answer is that it depends on the surface, not on habit. Primer is a prep coat that seals the surface, blocks stains from bleeding through, and gives your finish paint something to grab. On some walls, that work is already done, and a second coat of good paint will do fine. On others, skipping primer is the reason a job peels, flashes, or shows old water rings a month later. Knowing the difference is what separates a repaint that lasts from one you redo.
What Primer Actually Does
Before the "when," it helps to understand the "what," because every rule below traces back to one of these jobs.
Adhesion: Primer is formulated to bond to difficult surfaces and to give your topcoat a slightly toothy, uniform base to lock into. Finish paints are built for color and durability, not for gripping bare or slick material. On a surface paint would otherwise slide off, primer is the bridge.
Sealing porous surfaces: New drywall, raw wood, and bare masonry drink paint unevenly. The face paper of drywall absorbs differently than the dried joint compound over your seams, so a single coat of color looks blotchy where it soaked in versus where it sat on top. Primer seals those thirsty spots so the finish goes on even and you do not burn through three coats trying to hide flashing.
Blocking stains and tannins: Water rings, smoke residue, marker, grease, and the natural tannins in woods like cedar, redwood, and knotty pine will bleed straight up through ordinary paint, sometimes days later. A stain-blocking primer locks those in so they stay buried instead of ghosting back through your fresh color.
Hiding for big color changes: Going from a deep navy to a soft white is a punishing job for finish paint alone. A tinted primer resets the wall to a neutral base so your new color reaches its true shade in fewer coats instead of looking thin and patchy.
Uniform sheen: Patches, repairs, and spots where old paint has worn to different textures will reflect light unevenly under a fresh coat, a defect painters call flashing. Priming those areas evens out how porous the wall is, so the final sheen looks consistent across the whole surface rather than dull in patches.
When You Truly Need Primer
Reach for primer whenever the surface falls into one of these situations.
Bare drywall: New or newly exposed drywall needs a drywall primer (often a PVA type) to seal both the paper facing and the joint compound so they take paint at the same rate.
New wood, MDF, and trim: Raw wood is porous and often full of tannins; MDF has cut edges that swell and fuzz if you paint them wet without sealing first. Both want primer before color.
Bare masonry, stucco, brick, and concrete: These are highly porous and usually alkaline when new, which can attack ordinary paint. A masonry primer seals the surface and neutralizes that chemistry.
Patched and repaired areas: Spackle, joint compound, and wood filler are porous islands in an otherwise sealed wall. Left unprimed, they flash badly under the topcoat.
Stained, smoke-damaged, or water-damaged walls: Any discoloration that could bleed through needs a stain-blocking primer over the affected area. If the stain is from water, find and fix the leak first, because a stain sealed over an active leak simply returns.
Glossy or slick surfaces: Old oil-based paint, semi-gloss trim, tile, laminate, and previously varnished wood are too slick for a new coat to grip. A bonding primer (usually after a light scuff-sand and clean) gives paint a surface it can hold.
Big color changes, especially dark to light: A tinted or high-hide primer saves you coats and gives a truer final color.
Raw metal: Bare steel and iron need a metal primer to prevent rust from forming under the paint and pushing it off; galvanized and aluminum have their own bonding primer requirements.
When You Can Reasonably Skip It
Primer is not a tax you owe on every project. You can usually paint straight over the existing coat when all of these are true: the wall is already painted, the old paint is sound and firmly stuck (no peeling, chalking, or flaking), the surface is clean and dull rather than glossy, there are no stains or repairs to cover, and your new color is close to the old one. A clean, matte, beige wall going to a slightly different beige is the classic no-primer job. Two coats of quality finish paint will look great and last.
This is also where a good paint-and-primer-in-one earns its place, which is worth being clear about.
The Truth About "Paint and Primer in One"
A paint-and-primer-in-one is a higher-solids finish paint that bonds and hides better than budget paint. On an already-painted surface in good shape, it really does the job of both, and it is a fine choice for that easy repaint. What it is not is a real primer for the hard cases. It will not reliably seal bare drywall or raw wood; it will not block a water stain or wood tannin; and it will not bond to a glossy surface the way a dedicated bonding primer does. Marketing tends to imply the can replaces primer everywhere; treat it as a strong topcoat that covers the same-color repaint, not as a substitute for the specific primers those problem surfaces demand.
Primer Types, Matched to the Problem
Primers are not interchangeable. Picking the right one matters as much as deciding to prime at all.
Drywall/PVA primer: Water-based, inexpensive, and made to seal new drywall and joint compound evenly. Not a stain blocker.
Bonding primer: Formulated to grip slick, hard-to-coat surfaces like glossy trim, tile, laminate, and glass. This is your answer for "the old surface is too shiny."
Stain-blocking primer (shellac- or oil-based): The heavy hitters for sealing water rings, smoke, grease, marker, and tannin bleed. Shellac-based versions block the toughest stains and odors. These give off flammable, strong fumes, so open windows, run a fan, and wear a proper respirator, not just a dust mask.
Masonry primer: Alkali-resistant sealers built for stucco, block, brick, and concrete, handling both porosity and the surface chemistry.
Metal primer: Rust-inhibitive primers for bare ferrous metal, plus dedicated products for galvanized steel and aluminum.
Spot-Priming Versus Priming the Whole Wall
You do not always have to coat an entire wall. If the surface is otherwise fine and the only issues are a few patches, a water ring, or some bare repairs, spot-priming those areas is enough. Prime just the problem spots, let them dry, then paint the whole wall. The one catch is flashing: spot-primed areas can still show a faint sheen difference under a thin topcoat, so on a wall where that would bother you, plan on two finish coats or prime the full wall for a dead-even result. Full-wall priming is the move when the surface is bare, uniformly stained, glossy overall, or making a major color jump. Think of primer like the base coat on a manicure: on a nail that is already smooth and clean, you can go straight to color, but over a rough or patched spot, the base coat is what keeps the finish from chipping and looking uneven.
You do not always have to coat an entire wall. If the only issues are a few patches, a water ring, or some bare repairs, spot-prime just those spots, let them dry, then paint the whole wall. On a wall where a faint sheen difference would bother you, plan on two finish coats or prime the full wall.
Homes painted before 1978 may have lead paint. Test before you scuff or sand, and even on newer surfaces, sanding primer or old paint throws fine dust, so wear a mask and clean up thoroughly.
Frequently Asked Questions
White primer is standard, but tinting it toward your topcoat color is one of the highest-value tricks available. Most paint stores will tint primer to roughly half the strength of your finish color at no real trouble. For deep or saturated colors, especially reds and dark blues that are notoriously hard to cover, a gray-tinted primer can cut you from three finish coats down to two.
Most water-based primers are recoat-ready in about one to four hours, while shellac- and oil-based stain blockers can be topcoated even faster, often within an hour. Check the label, because drying and recoat times are different numbers. Cool temperatures and damp conditions stretch both. Painting before the primer has cured can trap solvents and cause the finish to wrinkle.
No. Finish paint lacks the high-adhesion resins and sealing binders that make a primer a primer, so a "primer coat" of ordinary wall paint will not bond to slick surfaces, seal porous ones evenly, or block stains. It just wastes a coat of your good paint on a job it is not built for.
A light scuff-sand still helps even with a bonding primer. The primer supplies the chemical grip, and a quick pass with fine sandpaper (around 220 grit) adds mechanical tooth and knocks down the shine, giving the strongest possible bond on doors, cabinets, and trim. Always clean off the sanding dust before priming.
A shellac-based primer is the product painters reach for to seal in odors, not just stains. It locks smoke, pet, and fire odors into the surface so they stop off-gassing into the room. Water-based and standard drywall primers do not seal odor, which is a common reason a repainted room still smells.
Yes. Exterior primers are built to flex with the daily expansion and contraction of siding, wood, and stucco under sun and moisture, and they resist mildew and UV breakdown in ways interior primers are not formulated for. Using an interior primer outdoors is a fast route to cracking and peeling, so match the primer to where it will live.
Not sure your surface needs primer? Get a free walkthrough and an honest answer before a brush touches the wall. Mark's Painting serves Tampa, Pinellas, and Pasco County. Call (813) 831-5433.
